How to populate data into navigateTo() ❓✅
My way of overcomplicating everything... just because... ;-)
Whether you're a Power Apps developer looking to enhance the user experience or an application consultant aiming to optimize business processes, this blog post will equip you with the knowledge and tools to master data population within the "navigateTo" function.
#1. Introduction - My scenario
By default there is a feature in Dynamics 365 called "Connections".
"[...] you can create and view the relationships between records for many entities using Connect. Connections enable you to easily associate users, contacts, quotes, sales orders, and many other entity records with each other. When you open a record and select Connections, you can view all of the connections between it and other records."
So when a client asks if he can, for example, relate a contact with several accounts, I usually refer to the connections. Of course, a separate relationship can be created for this, but why not use the standard if it is already there❓
So it was clear pretty quickly: we use the standard and thus the connections. 💡

There is already a "Connect" button on the account form...

...but it opens a new form when pressed; all pending changes must be saved or discarded immediately. 🥲

For the user, this kind of user experience is not the best, we can improve something there!
#2. Target
Wouldn't it be much better if we could leave the form open and also have the option to create a connection? 🚀🚀🚀
True, you could say "use canvas pages - WYSIWYG is the best thing ever!!", but handling lots of data like contacts in my case is possible, but not that great in canvas pages. It is faster to reuse things that are already there! 💡 Don't try to reinvent the wheel when it's not needed. ⛔💩
True, you could say "use the quick create form", but unfortunately this is not available for connections. 😉
Besides, main forms are much nicer than quick create forms anyway.

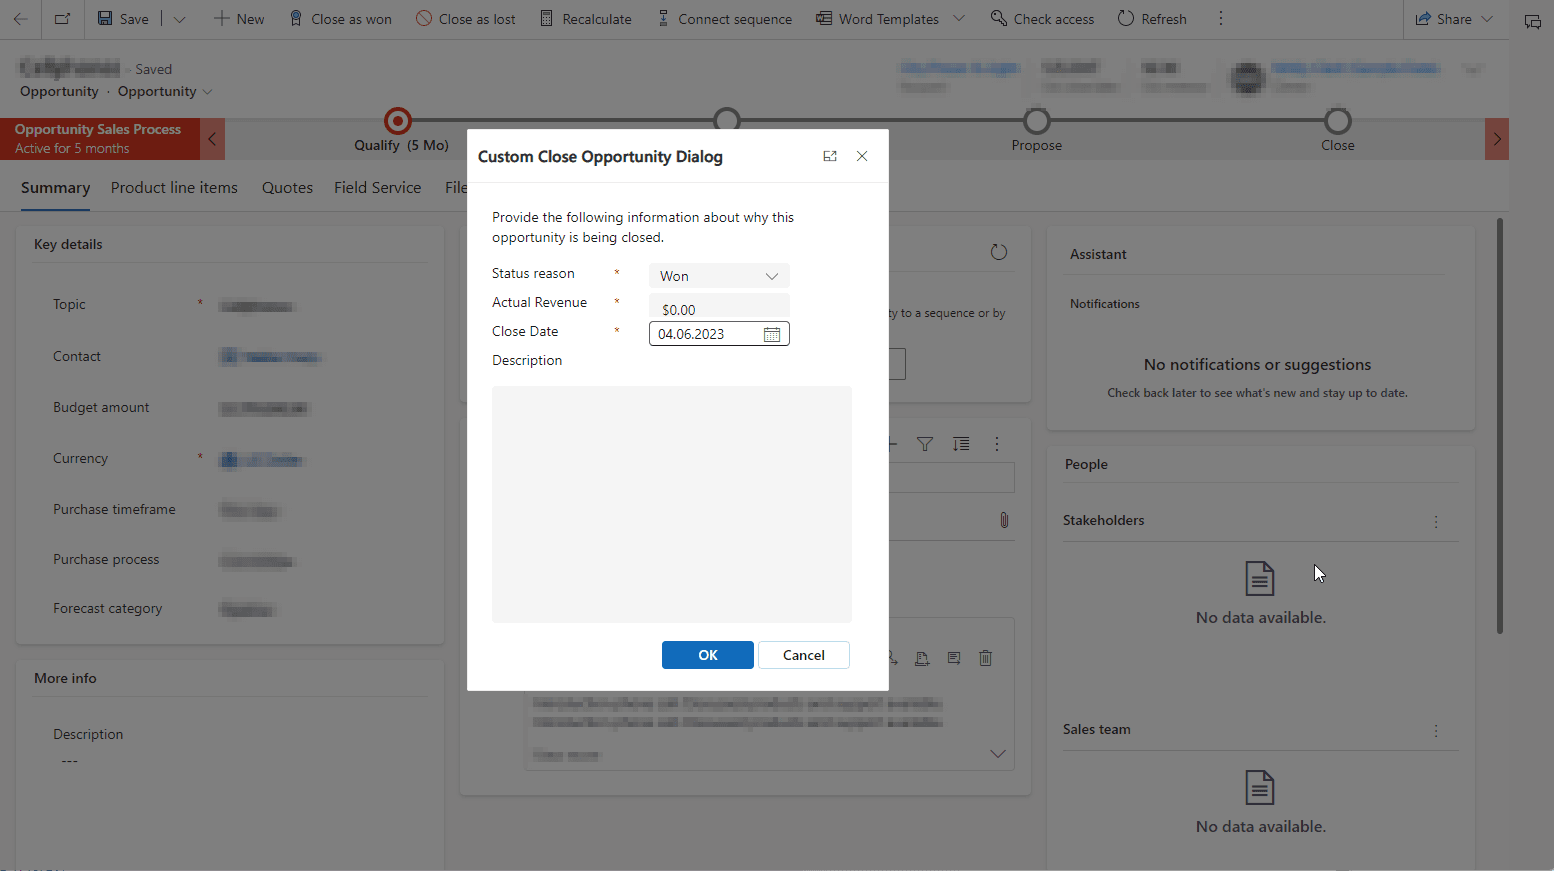
So instead of opening a new form like this:

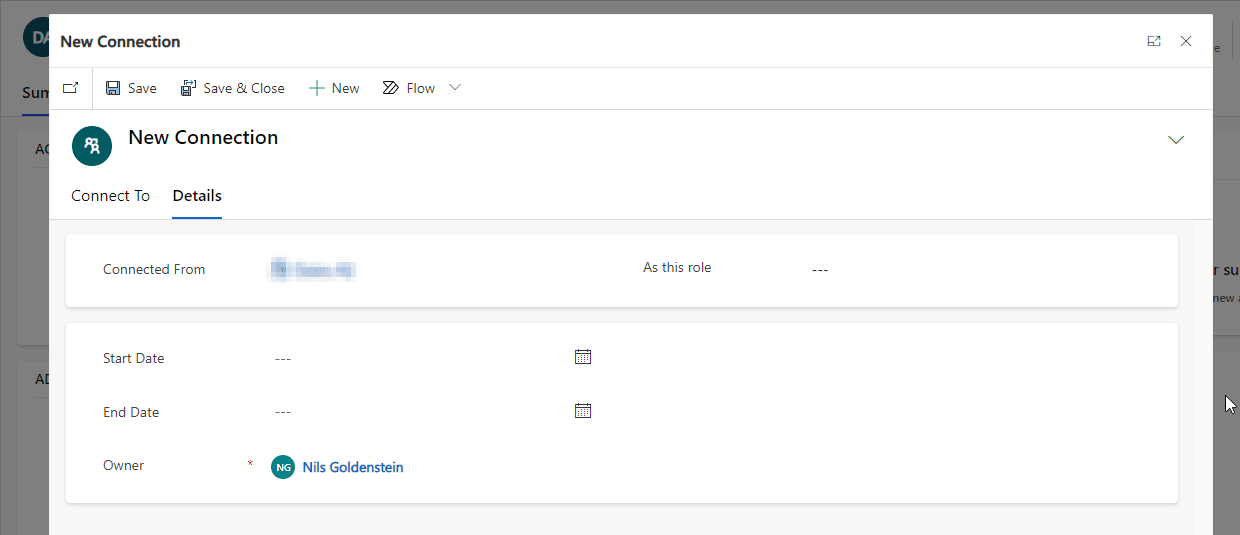
I would love to have something like this:

#3. Specialties
As you may know, when you press the "connect" button, the standard populates the "Connected From" field with the record from which you need the button.

That's cool 😎, that saves time ⏱️, we need that too 🤓!
#4. Implementation
So... how do we do that?
First, let's create a button!
#4.1 Creating a button using the command bar editor
For those of you who don't know how to open the command bar editor, please follow this documentation provided by Microsoft: Open the command designer to edit a command bar.
Create a new command button

Set the properties of the newly created button

But wait... where do I get the script from ❗❓
Ok... let's create one... 🦊
#4.2 Creating the JavaScript file
Just copy this and you'll be happy forever.

function OpenCreateConnectionAsModal(formContext) {

    var pageInput = {

        // open the connection form
        pageType: "entityrecord",
        entityName: "connection",

        // populate data
        data: {

            // ID
            record1id: formContext.data.entity.getId(),

            // Name of the record
            // "name" is attribute
            // Could also be something like "subject" or "new_name"
            record1idname: formContext.getAttribute("name")?.getValue(),

            // EntityLogicalName
            record1idtype: formContext.data.entity.getEntityName()
        }
    };

    var navigationOptions = {

        // open as modal
        target: 2,

        // define height in percent
        height: {
            value: 80,
            unit: "%"
        },

        // define width in percent
        width: {
            value: 70,
            unit: "%"
        },

        // centered
        position: 1
    };

    Xrm.Navigation.navigateTo(pageInput, navigationOptions).then(
        function success() {
            // Run code on success
        },
        function error() {
            // Handle errors
        }
    );
}
With the script in hand, we're almost done ✅... just deposit it briefly in the command button and enjoy. 🏖️🥂🚀

⚠️ And don't forget to set "PrimaryControl" as your first parameter!!!
After a quick publish, we're done! 🤩
If you don't want the "old" connection button to be visible (if available like it is for the account), just open the good old Ribbon Workbench and hide it. If you don't know how to use it: click here to get wisdom.

#4.3 Result
In conclusion, by taking a step beyond the default "Create Connection" experience in the Power Platform, we've made significant 💪 strides in enhancing the overall user experience. Through thoughtful 💭 customization and optimization, we've created a streamlined process that boosts productivity and improves workflow. Let's continue to challenge the status quo, explore innovative solutions, and empower ourselves to create exceptional user experiences within the Power Platform. 🚀 Together, we can revolutionize the way we work and unlock the full potential of this powerful tool.

That is something ChatGPT would say...
... I would say it was a small step in the right direction to improve the user experience bit by bit.
But what about you? If you have any questions ❓ or suggestions ❗ for improvement 🚀, please contact me - I'm happy to hear from you! 😊
I'm out ...